> Welcome to the Game 3 — Walkthrough
You are a journalist investigating the dark web from a seedy motel room. Welcome to the Game 3 takes place entirely within a single motel room — your computer is your gateway, and every sound outside the door could be your last. This walkthrough is based on official game data, community knowledge, and verified gameplay mechanics from Patch 1.0.1.
Game: Welcome to the Game 3 · Developer: Reflect Studios · Released: July 16, 2026 · Price: $17.99 · Last verified: July 23, 2026
// TABLE OF CONTENTS
Stage 1: Secure the Motel Room
Before you browse a single deep web page, you must secure your motel room. Rushing to the computer without preparation is the #1 cause of early deaths. You start with the door unlocked, zero equipment, and the clock ticking.

⏳ First 60 Seconds Checklist
- Lock the front door. Walk to the door immediately and lock it. This buys precious seconds before threats can enter.
- Find Cletus's meth. Search the room — there is a bag of meth hidden somewhere. Cletus will visit and demand it. Carry only 1 bag at a time; if you carry more, you lose everything to him.
- Learn the motel layout. Memorize these locations:
- Electrical room — controls power to your room and neighboring rooms
- Internet boxes — your connection to the deep web runs through these
- Package pickup locations — where items can be dropped off
- Escape routes — secondary exits and hiding spots
- Ace of Spades room — a specific room connected to Tucker's encounter
- Set up motion sensors. Recommended 3-sensor setup:
- Left motel end — covers the left corridor
- Right motel end — covers the right corridor
- Lucas's back door — Lucas picks the lock; this is critical early warning
- Check the peephole and cameras. Use the peephole to check before opening the door. If you have cameras, mount them on utility poles to watch for The Kidnapper's van.
- Start browsing. Once the room is secure, sit at the computer and begin your deep web investigation.
🛒 Priority Shopping List
Spend your DOS Coin in this order:
- 🔴 HIGH: Motion Sensors, Cameras, Earbuds, Security Software
- 🟡 MEDIUM: Puzzle Piece Location Upgrades
- 🟢 LOW: Luxury purchases, gambling (avoid unless you have surplus DOS)
Stage 2: Survive the Night — Threat Guide
Eight unique threats stalk the motel. Each has distinct warning signs, entry methods, and counters. Sound is your most important survival tool.
Stage 3: Deep Web Investigation
The deep web in Welcome to the Game 3 features 52+ interactive websites. 26 are always available, while others appear only during specific time windows. Over 47 sites become permanently dead as the night progresses — prioritize exploration early.

💻 Source Code Clues
A key mechanic new to WTTG3: hidden clues appear in website source code. View the page source (Ctrl+U or right-click) on every site you visit. Puzzle pieces, passwords, and links are frequently hidden in HTML comments, JavaScript files, and image metadata. This is easy to miss if you are used to previous WTTG games.
Stage 4: DOS Coin & Economy System
The deep web runs on DOS Coin. You need it for equipment, intel, and progression. Here is every way to earn and spend it.
The deep web runs on DOS Coin. You need it for equipment, intel, and progression. See the Beginner Guide for a complete breakdown of earning methods, VirtMesh mining tiers, and shopping priorities.
🎮 5 Hacking Minigames
Successful hacks earn DOS Coin. Each minigame tests a different skill:
- K3RN3LC0MP1L3R — kernel compilation challenge. Tests logical reasoning.
- memDEALLOCATER — memory deallocation puzzle. Tests spatial awareness.
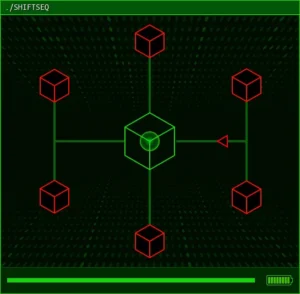
- shiftSEQ — sequence shifting. Tests pattern recognition.
- stackPUSHER — stack manipulation. Tests timed decision making.
- TOKENINE — token identification. Tests reaction speed.
Stage 5: Endgame & Ending Routes
As you approach the final act, the game escalates dramatically. Threats become more frequent, timed windows tighten, and your decisions lock you into specific ending routes.
⚡ Late-Game Changes
- Threat frequency spikes. Multiple threats can appear simultaneously — Lucas at the back door while Noir knocks at the front.
- The Bomb Maker activates (if you visited his site). Expect ticking devices.
- Timed windows narrow. Some endgame sites only appear in narrow 15-minute windows.
- Choices matter. Information you traded, sites visited, and NPCs handled all affect ending availability.
- Power may fail. The electrical panel can be sabotaged. Without power, you lose computer access, sensors, and lights.
🛤 Ending Routes
Your ending depends on multiple factors. We are compiling verified ending conditions from community reports. Key known factors include:
- Which deep web sites you fully explored (especially The Light Within and Symphoros Chosen)
- How you handled each NPC encounter
- Whether you visited The Bomb Maker's site
- Your DOS Coin balance and equipment at the final decision point
- Information gathered and who you shared it with
Last verified: July 23, 2026 (Patch 1.0.1) · Unofficial fan resource